Photoshop Keyboard Shortcut Apply Filter Again
Hither are 10 of my favorite tips, techniques, and shortcuts for working with filters in Photoshop.
Apply the Last Used Filter — Command + Control + F (Mac) | Control + Alt + F (Win) executes the last used filter.
Brandish the Last Used Filter —Command + Selection + F (Mac) displays the dialog box for the last used filter. (Notation: at that place is no default keyboard shortcut for Windows, however you tin can brand your own by customizing the shortcut for Filter > Concluding Filter and then calculation the alt key when using that custom shortcut!)
Filter Gallery — Filter Gallery tin can only be applied to 8 scrap images. While in the Filter Galley dialog:
• Selection -click (Mac) | Alt -click (Win) a filter's preview icon to add it every bit a new filter (instead of replacing the current filter).
• Option -click (Mac) | Alt -click (Win) the disclosure triangle to the left of a Filter Category to expand/plummet all categories.
Annotation: If you adopt to view the artistic filters listed nether Filter Gallery in the filter menu, select Preferences > Plug-ins > Show All Filter Gallery Groups and Names.
Apace Find and Apply a Filter —If you know the proper noun of the filter that yous are trying to run, only don't desire to waste product fourth dimension finding it in the menus, use Command + F and type the filter name into the search dialog. If you often utilise the same filters, assign a keyboard shortcut to them using the Keyboard shortcut editor (Edit > Keyboard Shortcuts)
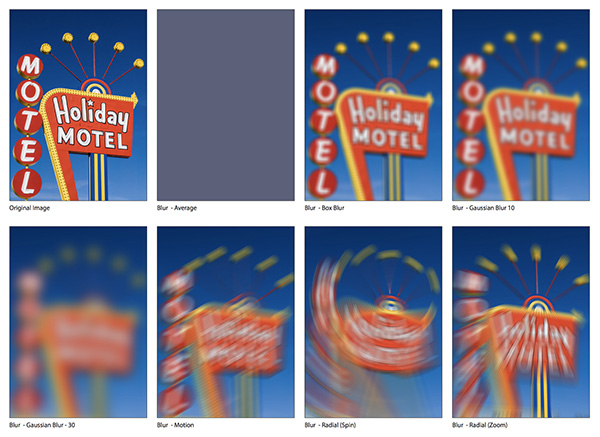
PDF with Examples of Photoshop Filters —I created this PDF (JKost_ArtisticFilters) for my Photoshop Essential Training course on Lynda.com | LinkedIn Learning. The examples are pretty straight frontwards, (meaning that I didn't combine any filters to make "complicated" effects), but I retrieve it's a proficient resource especially for anyone that is teaching Photoshop.
Non-destructive Filtering of Layer(s) —Any filter applied to a Smart Object automatically becomes a "Smart Filter". (Cull Layer > Smart Object > Convert to Smart Object to convert the selected layer(s) into a Smart Object earlier adding the filter).
• Change the filter parameters of a Smart Filter at any time by double clicking on the name of the filter in the Layers panel (that'south what makes them smart, they're nondestructive and re-editable at any time).
• Change the Opacity and Blend Way of the Smart Filter by double clicking the Filter Blending Pick (two small lines with triangles under then to the right of the filter name in the Layers panel.)
• Paint in the Smart Filter mask simply as you would whatever layer mask (black to hide the filter, white to show).
• When working with video in Photoshop, converting a layer into a Smart Object and then adding a filter applies the filter to all frames in a video layer (not just the first frame).
Moving Smart Filters —In the Layers console, drag the name of the Smart Filter to copy it from one layer to another.
Duplicating Smart Filters —Option -elevate (Mac) | Alt -drag (Win) a Smart Filter from i layer to another will behave differently based on where you click and elevate:
• Dragging the name of the Smart Filter duplicates without copying the mask.
• Dragging the "Smart Filters" text (next to the mask) will duplicate the Smart Filter including the layer mask.
Making a Selection on a Layer with a Smart Filter —If you use a Smart Filter's mask to hide the furnishings of a Smart Filter, Photoshop will still make selections based on the filtered content – fifty-fifty though information technology is hidden. This video (How to Simulate a Long Exposure with the Path Blur Filter), demonstrates how to become around this by toggling the visibility of the filter or, you can read the step-by-step beneath…
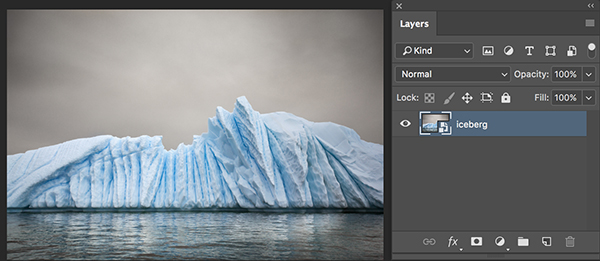
Here is the original photo of an iceberg, converted to a Smart Object in gild to add the Path Blur filter equally a Smart Filter.
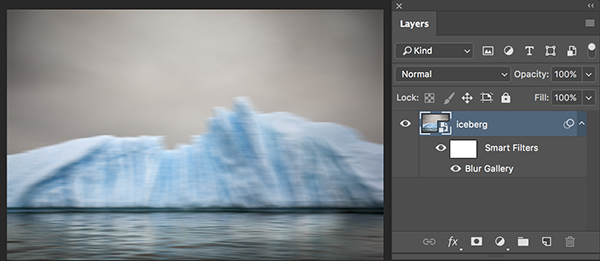
The analogy beneath shows later adding the Path Blur (listed as Blur Gallery on the Layers panel) as a Smart Filter. Notice that the entire layer is blurred.
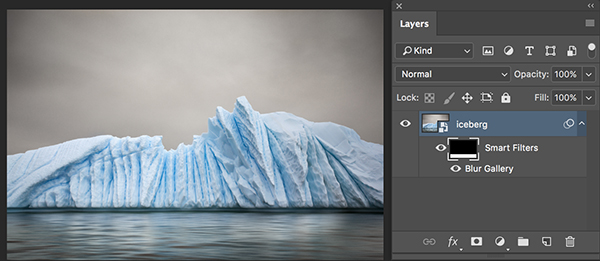
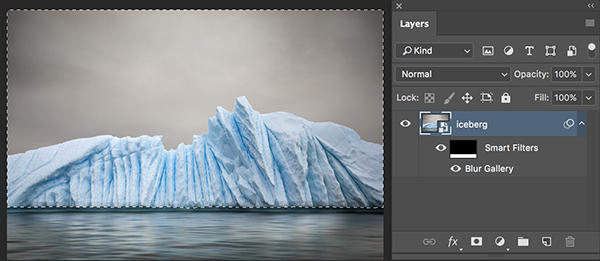
Cartoon a linear gradient in the Smart Filters mask reveals the Path Blur in the h2o, but hides it from the iceberg.
Using the Quick Select tool, I expected Photoshop to easily select only the sky, but it selected the iceberg as well (because Photoshop applies the Path Blur to the unabridged layer – the mask is only hiding the filter).
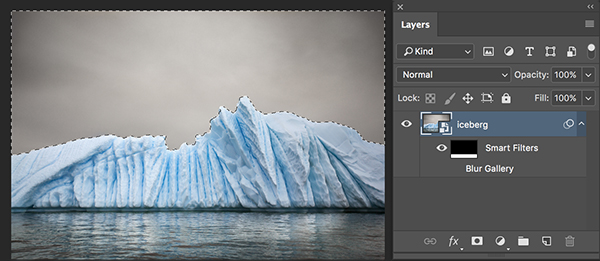
Hiding the Path Blur (by toggling off the middle icon adjacent to Blur Gallery), enabled the Quick Select tool to easily select the sky.
In the final image below, I added the new sky layer (adding a mask based on the choice so that they heaven wouldn't overlap the iceberg), and toggled on the visibility of the Blur Gallery Smart Filter (to display the Path Blur filter in the water).

Fading Filters —Command + Shift + F (Mac) | Control + Shift + F (Win) displays the Fade options to alter Opacity and Alloy Mode of the fade concluding filter applied. Notation: the Fade command can just exist applied directly subsequently running the filter and can not be used on a Smart Object (because Smart Objects are non-distructive and can exist changed at whatever fourth dimension using the Layers console).
armstrongsaidgety.blogspot.com
Source: https://jkost.com/blog/2017/06/general-filter-shortcuts-for-photoshop-cc.html
0 Response to "Photoshop Keyboard Shortcut Apply Filter Again"
Post a Comment